The Complete Guide to Shed Removal Services
Sheds are a convenient addition to any backyard, providing extra storage space for tools, gardening supplies, and more. However, when a shed becomes old, damaged, or no longer needed, removing it can be a daunting task. Whether you’re making room for a new garden feature, expanding your outdoor space, or simply clearing out an unused structure, shed removal is a job that requires careful planning and execution. In this guide, we’ll walk you through the process of shed removal, explain the benefits of hiring professional services, and offer tips for ensuring a safe and efficient removal.
Why Shed Removal Might Be Necessary
- Structural Damage: Over time, sheds can suffer from weather-related wear and tear, leading to structural issues that make them unsafe.
- Space Reclamation: Removing an old shed can free up valuable space in your yard, giving you more room for new projects or simply more open space to enjoy.
- Aesthetic Improvement: An old, dilapidated shed can be an eyesore. Removing it can instantly improve the look of your property.
- Preparing for a New Structure: If you’re planning to build a new shed, garage, or other outdoor structure, removing the old one is the first step.
How to Plan for Shed Removal
1. Assess the Condition of the Shed
Before you start, evaluate the shed’s condition to determine the best approach for removal. Consider:
- Materials: Is the shed made of wood, metal, or plastic? Different materials require different disposal methods.
- Size and Complexity: Larger, more complex sheds may require professional help, especially if they have electrical connections or heavy foundations.
- Hazards: Look for any potential hazards, such as asbestos, mold, or infestations, that might require special handling.
2. Decide on DIY vs. Professional Removal
Next, decide whether you want to tackle the shed removal yourself or hire a professional service. Here are some factors to consider:
- DIY Removal: If the shed is small and you have the necessary tools and experience, you might be able to handle the removal yourself. However, DIY removal can be time-consuming and physically demanding.
- Professional Removal: Hiring professionals is the safest and most efficient option, especially for larger sheds or those with structural issues. Professionals have the tools and expertise to dismantle the shed safely and dispose of the materials responsibly.
3. Obtain Necessary Permits
In some areas, you may need a permit to remove a shed, especially if it’s a large structure or if the removal involves electrical disconnection or significant site changes. Check with your local municipality to see if any permits are required.
4. Prepare the Area
Before the removal process begins, make sure the area around the shed is clear. Remove any obstacles that could get in the way, and ensure that there’s enough space for the shed to be dismantled and removed.
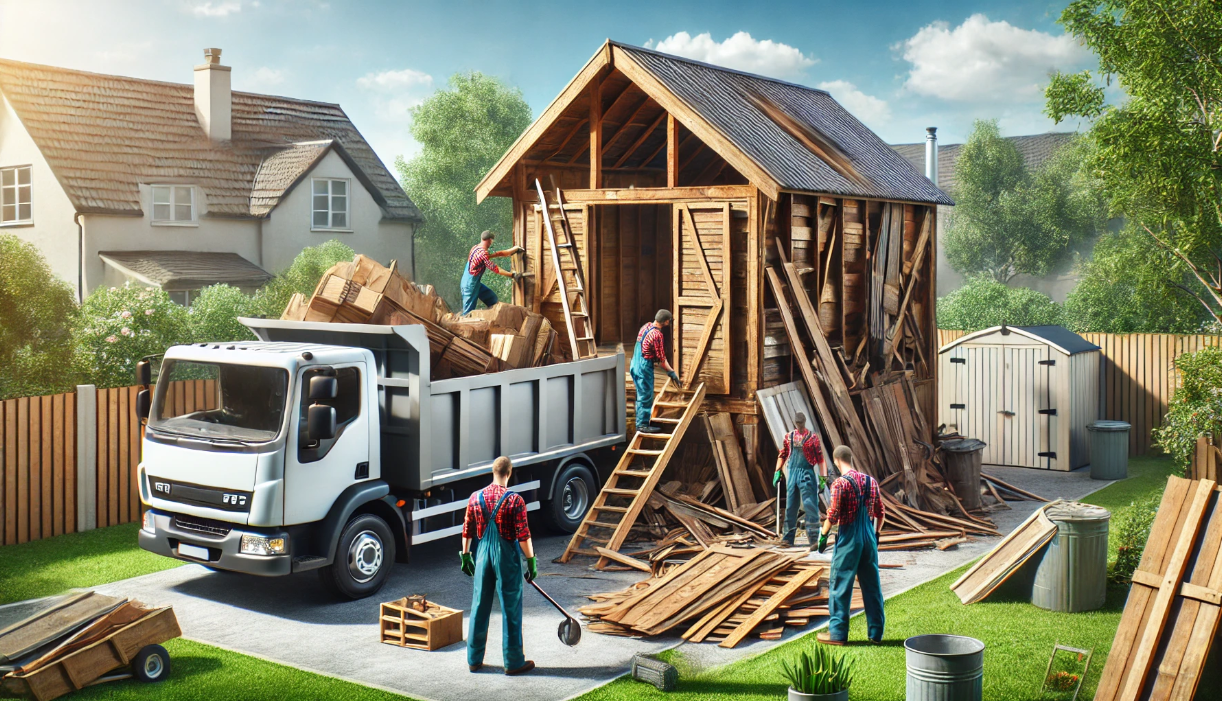
The Shed Removal Process: Step-by-Step
1. Disconnect Utilities
If your shed is connected to electricity, water, or gas, these utilities must be safely disconnected before removal. This is a job for a licensed professional, as improper disconnection can be dangerous.
2. Empty the Shed
Remove all items from the shed before dismantling begins. This includes tools, equipment, and any personal belongings. Take this opportunity to sort through the items and decide what to keep, donate, or discard.
3. Dismantle the Shed
The dismantling process will vary depending on the shed’s construction:
- Wooden Sheds: Start by removing the doors and windows, followed by the roof and walls. The structure can then be taken apart piece by piece.
- Metal Sheds: Metal sheds often have screws and bolts that need to be removed before the panels can be taken down.
- Plastic Sheds: These are usually the easiest to dismantle, with components that snap or bolt together.
4. Remove the Foundation
If the shed has a foundation, such as a concrete slab or wooden platform, this will also need to be removed. Concrete may require breaking up with a jackhammer, while wooden foundations can be disassembled with basic tools.
5. Clean Up and Dispose of Materials
After the shed is dismantled, the next step is to clean up the area. This includes removing any debris and properly disposing of the shed materials:
- Wood: Treated wood should be disposed of at a landfill or recycling center that accepts it. Untreated wood may be suitable for recycling or even repurposing.
- Metal: Metal parts can often be recycled at a scrap yard.
- Plastic: Some plastics can be recycled, but check with your local recycling center for specific guidelines.
Benefits of Hiring Professional Shed Removal Services
- Safety: Professionals have the experience and equipment to safely dismantle and remove sheds, minimizing the risk of injury or damage to your property.
- Efficiency: A professional team can complete the job quickly, often within a day, saving you time and effort.
- Proper Disposal: Professionals ensure that all materials are disposed of responsibly, recycling where possible and following environmental regulations.
- Stress-Free Process: With professionals handling the removal, you can relax and focus on other projects or simply enjoy your newly reclaimed space.
Shed Removal Checklist
| Task | Description | Tools Needed |
|---|---|---|
| Assess the Condition | Evaluate the shed’s materials and structure | Notepad, Camera |
| Decide on DIY vs. Professional | Choose between DIY removal or hiring professionals | Internet, Phone |
| Obtain Necessary Permits | Check local regulations and obtain required permits | Contact Info |
| Prepare the Area | Clear surrounding area for easy access | Rake, Gloves |
| Dismantle the Shed | Take apart the shed starting with the doors and roof | Screwdriver, Hammer |
| Remove the Foundation | Break up concrete or disassemble wooden foundation | Jackhammer, Saw |
| Clean Up and Dispose of Materials | Dispose of shed materials responsibly | Truck, Trash Bags |
Tips for a Smooth Shed Removal
- Plan Ahead: Don’t wait until the last minute to schedule shed removal, especially if you need the space cleared for a new project.
- Hire a Licensed Contractor: Ensure that the contractor you hire is licensed, insured, and has good reviews.
- Consider the Weather: Plan the removal for a day with good weather, as rain or high winds can complicate the process.
- Reuse and Recycle: If possible, consider reusing materials from the shed in other projects or donating them to someone who can use them.
Frequently Asked Questions
Q1: How much does shed removal cost?
The cost varies depending on the size and complexity of the shed, as well as your location. On average, shed removal costs between $500 and $1,000.
Q2: Can I remove a shed myself?
Yes, you can remove a shed yourself if it’s small and you have the right tools and experience. However, for larger or more complex sheds, professional removal is recommended.
Q3: What happens to the materials after the shed is removed?
Most materials can be recycled or disposed of responsibly. Wood, metal, and plastic components are often taken to recycling centers, while hazardous materials are disposed of according to local regulations.
Q4: How long does the shed removal process take?
The process typically takes a few hours to a full day, depending on the size of the shed and whether it has a foundation.
Q5: Do I need a permit to remove my shed?
Permit requirements vary by location. Check with your local municipality to determine if a permit is needed for shed removal.
Have you recently removed a shed from your property? Share your experiences and tips in the comments below! Your story could help others navigate their shed removal projects.
Shed removal can seem like a daunting task, but with the right plan and help from professionals, it can be done quickly and safely. Whether you’re reclaiming space, improving your property’s appearance, or preparing for a new project, following the steps in this guide will ensure a smooth shed removal process.
Ready to remove your shed? Contact us today for professional shed removal services that make the process hassle-free!